As you may already know, VS 2017 (formerly VS “15”) introduces a couple of very welcomed changes:
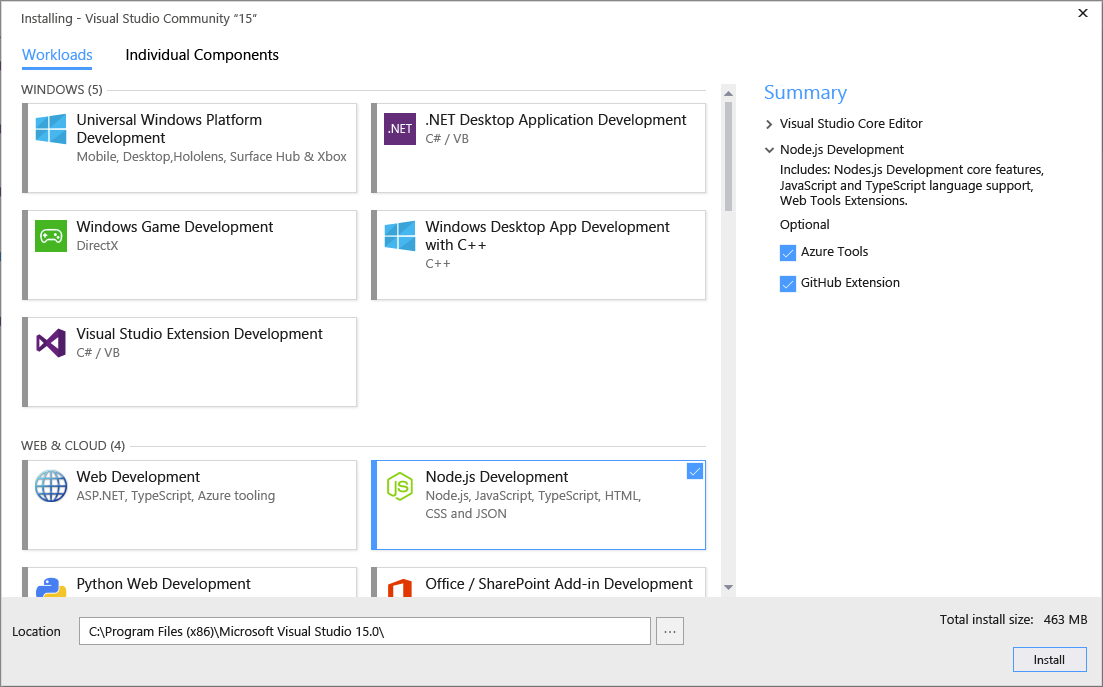
- It provides a new modular setup that allows you to decide which tools (“workloads”) you want to install and, most importantly, which ones you don’t want at all. The consequence is that installing VS 2017 is much, much faster (unless you install a lot of workloads, of course). This suggestion had almost 2,000 votes on UserVoice. For VSX developers like me that already have six versions of Visual Studio installed (from VS 2005 to VS 2015) on the main dev machine (not counting isolated installations on virtual machines) and know how painful each installation is, this is big news.
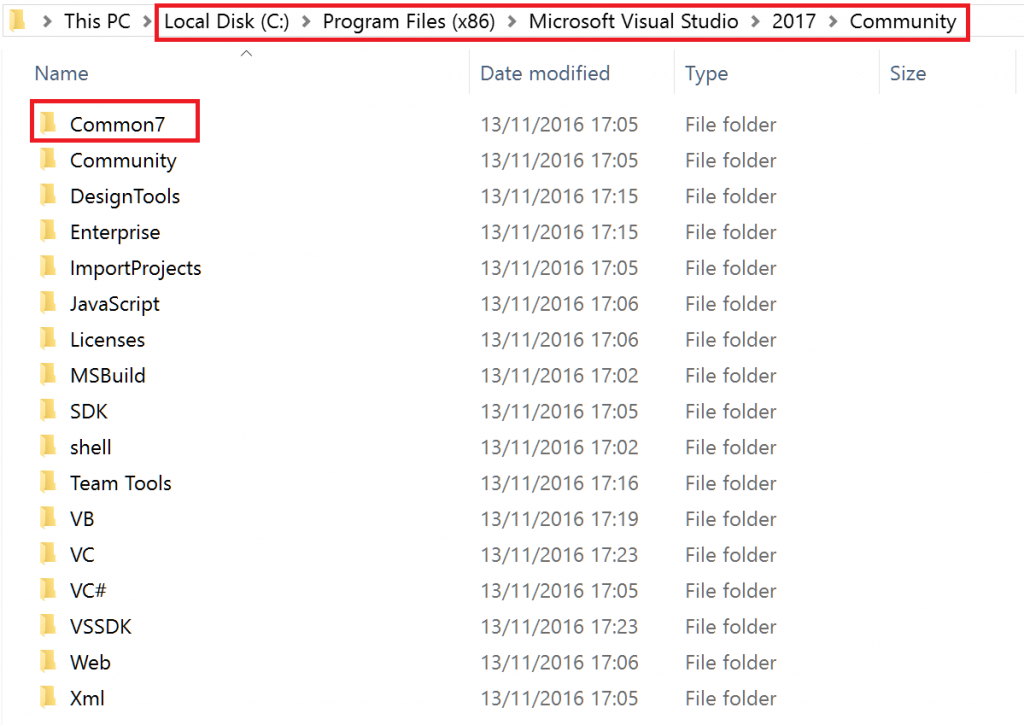
- Visual Studio 2017 allows to coexist several editions on the same machine. So, you can have VS 2017 Community Edition, VS 2017 Professional Edition and VS 2017 Enterprise Edition. This may not be very useful for end users, but for VSX developers it allows you to test your extension (which needs to declare the minimum supported edition in the Vsix manifest) on the three editions on the same computer. Here you can see my computer with the Community edition installed (notice the familiar “Common7” folder inside the “Microsoft Visual Studio\2017\Community” folder):
If you want the details about the new setup experience, the official posts from Microsoft about this on the Visual Studio blog are the following:
Faster, Leaner, Focused on Your Development Needs: The New Visual Studio Installer
Visual Studio “15”: Installing Just What You Need
Anatomy of a Low Impact Visual Studio Install
On the Road to Release: Redesigning Visual Studio Installation
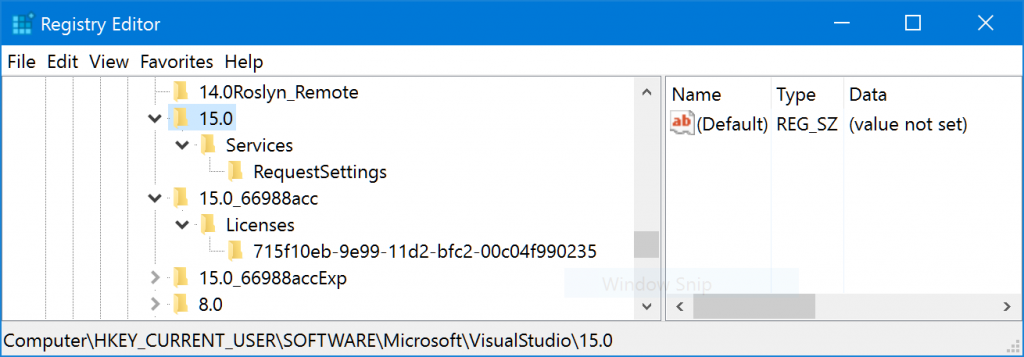
But not only that. Visual Studio 2017 is also much more isolated and resilient. It doesn’t install Visual Studio assemblies in the Global Assembly Cache (GAC) and it doesn’t use for the most part the main Windows Registry. In the past (since VS 2010, see my post The strange case of the registry key HKEY_CURRENT_USER\Software\Microsoft\VisualStudio\10.0_Config\Projects\{C8D11400-126E-41CD-887F-60BD40844F9E}), Visual Studio redirected HKEY_LOCAL_MACHINE\Software\Microsoft\VisualStudio\<version> to HKEY_CURRENT_USER\Software\Microsoft\VisualStudio\<version>_Config, to allow installation of extensions through .pkgdef files without admin rights, etc. Now, VS 2017 uses its own private registry. See how empty is the regular HKEY_CURRENT_USER\Software\Microsoft\VisualStudio\15.0 key on my machine and notice that there is no 15.0_Config key:
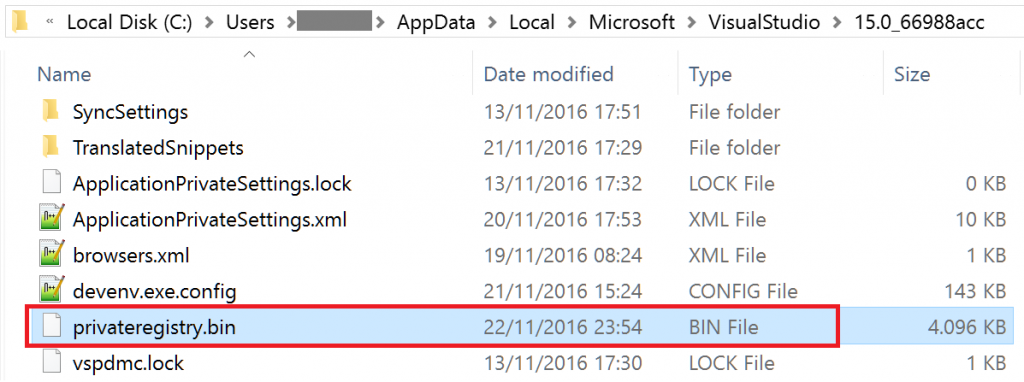
Instead, the VS 2017 private registry is stored in your AppData folder:
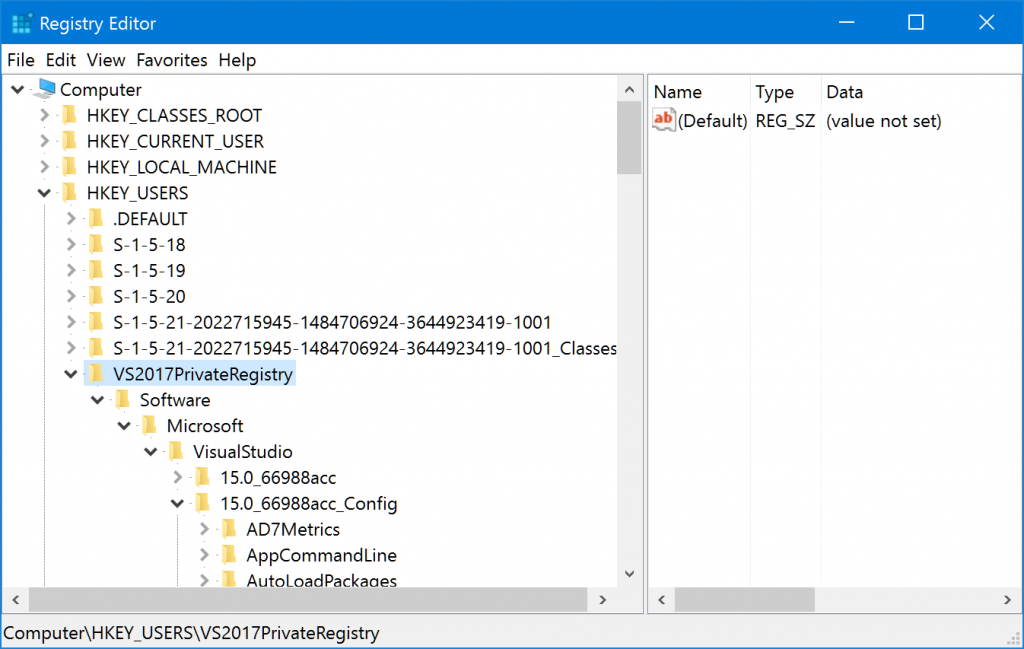
Fortunately, you can use regedit.exe to load a private hive. You need to select the HKEY_USERS node, and click the File > Load Hive… menu. You select the privateregistry.bin file, give a name to the hive (I entered “VS2017PrivateRegistry”) and now you can see the 15.0<id>_Config key populated as usual (note: use File > Unload Hive when done):
Hopefully all this isolation and resilience can prevent the problems that I suffered with VS 2015 when my Surface Pro 4 crashed at boot time due to a buggy antivirus update (I never recovered VS 2015).
So far, so good, but all this will cause some issues to VSX developers. I adapted my MZ-Tools extension to run in Visual Studio 2017 some weeks ago and I am these days migrating my old .NET-based custom builder for MZ-Tools to fully embrace MSBuild and hopefully to use a separate Windows Azure build server, better environment/workspaces isolation, etc.
The changes above can cause some trouble:
- The location of devenv.exe for Visual Studio 2017 has changed, and can be several of them.
As explained above, you can have now several Visual Studio 2017 installations on your machine. In the past (until Visual Studio 2015) you could query the HKEY_LOCAL_MACHINE\SOFTWARE\WOW6432Node\Microsoft\VisualStudio\14.0, InstallDir entry, to get the (only) installation folder for Visual Studio (2015). Now, there can be several Visual Studio 2017 installation folders (Community, Professional, Enterprise), and you cannot query the registry directly. Instead, the official approach is to use some interop assemblies (Microsoft.VisualStudio.Setup.Configuration.Interop) provided by Microsoft to enumerate the Visual Studio 2017 installations. See the post Changes to Visual Studio “15” Setup and the Microsoft/vs-setup-samples samples on GitHub. Of course, for your own use on your own build script you can hardcode paths ;-). - External processes cannot read Visual Studio 2017 registry entries directly.
Extensions can read Visual Studio 2017 registry entries from the private registry in a transparent way, because being dlls, they run in-process with devenv.exe and leverage the redirection provided by Visual Studio. But out-of-process executables or scripts need to use the RegLoadAppKey function. See the section “Change: Reduce registry impact” in Breaking Changes in Visual Studio 2017 extensibility. - The location of MSBuild for VS 2017 has changed, and can be several of them.
In the past (until Visual Studio 2015), the path of MSBuild was “C:\Program Files (x86)\MSBuild\<version>”, where <version> was “4.0”, “12.0” (VS 2013), “14.0” (VS 2015). There is no “15.0” folder there for VS 2017. Instead, MSBuild for VS 2017 is installed in the folder “C:\Program Files (x86)\Microsoft Visual Studio\2017\<edition>\MSBuild\15.0”, where edition can be “Community”, “Professional” or “Enterprise”. Again, for your own use on your own build script you can hardcode the path, but if you want to use a more proper way, you need to get the VS 2017 installation folder as explained above and concatenate “MSBuild\15.0”. Or you can wait until Microsoft releases a document about how to resolve MSBuild location (they are working on it and now that MSBuild is open source you can follow the progress on GitHub). BTW, you can download the MSBuild Tools for Visual Studio 2017 RC here. - The location of tf.exe (Team Explorer command-line) has changed.
In the past, for Visual Studio 2013 and 2015 it was stored in the folder C:\Program Files (x86)\Microsoft Visual Studio <version>\Common7\IDE. For Visual Studio 2017, it is installed in the folder of the Team Explorer extension (C:\Program Files (x86)\Microsoft Visual Studio\2017\<edition>\Common7\IDE\Extensions\<random folder>). Fortunately, there is a shortcut in the folder C:\Program Files (x86)\Microsoft Visual Studio\2017\Community\Common7\IDE\CommonExtensions\Microsoft\TeamFoundation\Team Explorer that point to that location. Did I mention that there can be several editions of Visual Studio 2017 installed? - The VsWebSite.Interop.dll automation file is not included in the Core Editor and causes FileNotFoundException.
The EnvDTE automation assemblies don’t provide extensibility for all kind of projects (for example, you cannot get project references for VB/C# projects with that assembly). For VB/C# projects, you need the VSLangProj.dll family of assemblies. Both EnvDTE and VSLangProj are included by default with the Core Editor of Visual Studio 2017 and therefore your extension will work just declaring Visual Studio Code Editor as dependency in the new Vsix Manifest editor for version 3: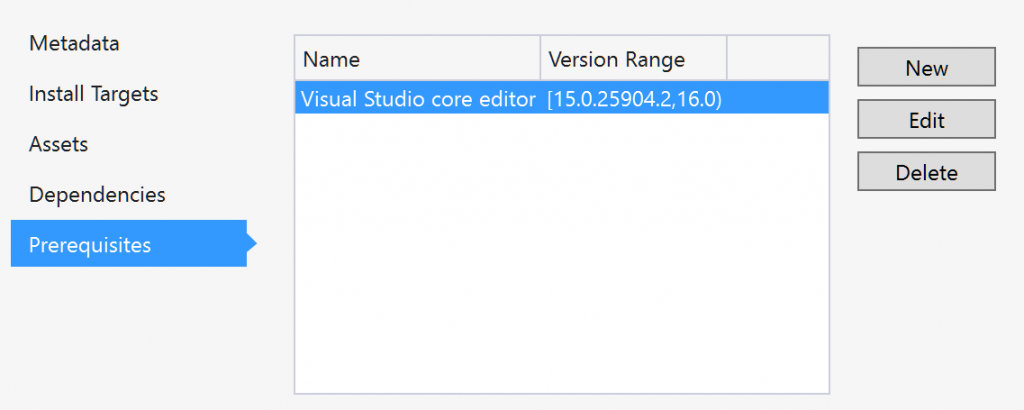
Those assemblies are also valid for Web Application projects. However, Visual Studio 2005 introduced Web Site projects, that lack a project file and Microsoft provided the VsWebSite.Interop.dll family of assemblies to deal with that kind of projects using automation (for example, to get their references). Alas, the VsWebSite.Interop.dll assembly is not included in the core editor, and therefore each time that a method of your extension uses its types (when the method is JIT-compiled) will cause FileNotFoundException. For example a method with this code:
foreach (EnvDTE.Project project in solution.Projects)
{
   langProject = project.Object as VSLangProj.VSProject;
   if (langProject != null)
   {
   ...
   }
   else
   {
       webProject = project.Object as VsWebSite.VSWebSite;
       if (webProject != null)
       {
       ...
       }
   }
}
I reported this to Microsoft through private channels and on Microsoft Connect (VsWebSite.Interop.dll extensibility assembly not installed by Visual Studio core editor) and the only answer so far has been that the extension must declare a dependency on the Microsoft.VisualStudio.WebTools (which installs that assembly), but that is not a solution for me since:
1) That component installs tons of files related to web development, not only VsWebSite.Interop.dll. The user should not be forced to install web-related stuff (project templates, etc.) that she doesn’t require and that would dirty the Visual Studio installation for that simple extension to work.
2) Even if only VsWebSite.Interop.dll was installed by that Microsoft.VisualStudio.WebTools component it would be annoying for users to install that component.
It is a good thing that Microsoft uses EnvDTE / VSLangProj internally and therefore they needed to include them in the Core Editor. Otherwise they wouldn’t be there either. You know that I am not very fan of EnvDTE/VSLangProj although I still use them very heavily (Microsoft has insisted that they are not going to disappear or be deprecated).
Fortunately, there is a workaround, that is what I used. I refactored the methods of MZ-Tools that use the types of VsWebSite.Interop.dll to move the code inside the method that uses the types to a new method and then handled gracefully the FileNotFoundException. For example:
public Collection References
{
   get
   {
      Collection references = new Collection();

      AddLangProjReferences(references);

      if (references.Count == 0)
      {
         try
         {
            AddWebSiteReferences(references);
         }
         catch (System.IO.FileNotFoundException)
         {
            // This can happen in VS 2017 if the web development workload is not installed
         }
      }
      return references;
   }
}
I hope this post helps you. Happy coding!
